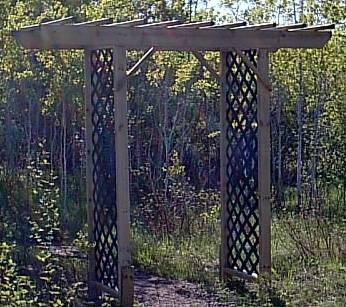
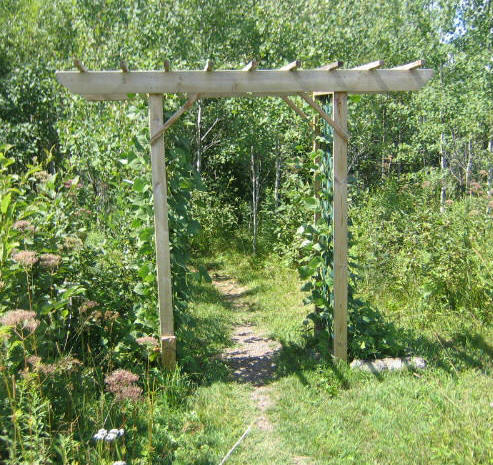
| Introduction: The measurements for the Trellis in this plan are: 44" Wide Opening x
84" High Opening x 26" Deep
Of course, you can adjust these measurements to suit your requirements.
Materials for the Trellis; Use Cedar, treated wood, or any other wood suitable for outdoors and galvanized screws/bolts/nails
for all requirements:
2 x 6 x 8 ft: 2 for upper, front/back Top Rails
2 x 4 x 8 ft: 5 for side Lattice Frames
2 x 2 x 4 ft: 11 for top Cross Rails and angled Support Brackets
Plastic lattice (available in various colors), 4 ft x 8 ft: 1
1 x 3 x 10 ft: 1 for support/transport Support Rails
Galvanized nails, 3": 60 (Optional: use deck screws and/or carriage bolts.)
4' long metal support posts: Four for Post Anchors
Step One, Build left/right Lattice Frames
Select four of the 2 x 4 x 8' stock and cut them to a length of 84"; these will become the
four support posts (used as the side posts for the frames of the plastic lattice).
Select one other piece of 2 x 4 x 8' stock for the top and bottom rails of the lattice frames. Cut this
into four pieces: each piece is 23" long.
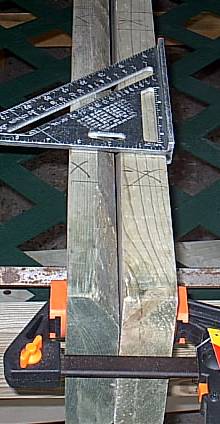
Check the thickness of the plastic lattice; set up your
dado blade to accept this width; should be 3/16". Set
the depth for 9/16". Make your dado cut in the center on
one side of each of all of the selected 2 x 4 pieces in this
step (four @ 84"; four @ 23"); top to bottom, lengthwise as
shown above.
You now have four Posts and four Rails with dado cuts
required to build the left and right Lattice Frames.
Select the 4 x 8 Plastic Lattice; crosscut it to 72 1/2".
Rip the 72 1/2" piece down the middle forming two approx
24" wide pieces; one half for each side panel.
Assemble the Trellis side panels:
Select the four, 84 "Side Posts with the dado
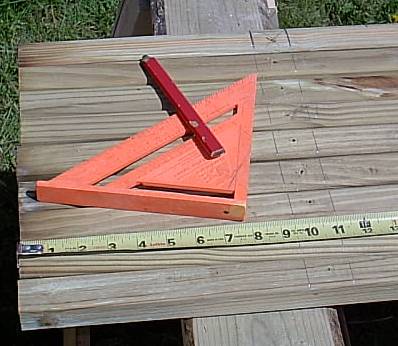
cuts facing you, measure five inches from the bottom end and
using a speed square, mark a pencil line across the posts,
five inches from the bottom; across the dado cuts.
Select two, 84" Side Posts; lay them on
edge with the dado facing each other. Select
two, 23" rails for the top and bottom rails; lay them
on edge with the dado cut facing each other; using the guide
marks on the bottom of the Side Posts as shown above, place
one rail on the bottom and mark the piece as the bottom.
Select four, 3" nails; drive two nails on each side; drive
them through the posts into the Bottom Rail (ensure that you
do not nail into the dado groove).
Insert one of the lattice panels into the dado cut of the
two sides and bottom rail of the frame.
Place the Top Rail in place (ensure the measurement from
the top edge of the post on each side are equal, 4 1/2") and
secure with nails; two on each side.
One Side Panel is now complete; repeat this same process
for the other side panel.
Step Two, Layout the markings for the Crossbars on the
top edge of the 2 x 6 x 8' Front and Back Top Rails
Select the two, 2 x 6 x 8' pieces that will become the
Front/Back Top Rails.
Lay them on edge across your saw horses and clamp them
together as shown above with the all edges flush. The
edges you will mark will become the top edges.
Measure in six inches from each end and, using a speed
square, make a mark across both pieces; measure 1 1/2" and
make another mark; between these two marks is where the
crossbars will be placed. Repeat this process at the
other end.
Locate and mark the center of the two Top Rails; measure
and mark 3/4" on each side of this mark; this will become the
placement for the center Crossbar. With the center and
two ends marked; layout the remaining six marks by measuring
equal distances, on-center; the measurement for all crossbars
is 10 1/2" on center.

Step Three, Make 45 degree Cut on Top Rails
Measure down two inches from the top edge of each Top Rail
and make a 45 degree cut at each of the four ends as shown.
Step Four, Attach the Side Panels to the Top Rails.
Lay one Top Rail on the ground as shown above. Locate
the center of the 2 x 6 x 8' Top Rail; measure 22" to each
side of the center and make a mark; add 3 1/2" and make
another mark; this space will mark the guidelines for the
placement of the Side Panel. Repeat this process for the
other Top Rail (mark both Top Rails at this time).
Within the guidelines, place the top edge of one Side
Panel perpendicular to the top edge of the Top Rail and secure
with four nails. Without moving the structure, repeat
this process for the other Side Panel; the two Top Rails are
now attached to the two Side Panels.
Step Five, Attach the Support and Corner Bracing
Near the top edge where the Side Panels meet the Top Rail
measure the outside distance of one Side Panel to the other
outside edge, 51". Select the 1 x 3 x 10' and cut two
Temporary Support Rails to this exact measurement, 51".
On each Side Post measure up from the bottom 16" and place
a mark. Take one, 51" Temporary Support Rail and lay it
across the Trellis opening connecting the two side panels
using the 16" mark as a guide. And with the outer edges
touching, place one nail (do not drive it all the way in as
this Support Rail is for temporary support purposes only) at
each end and secure it to both Side Panels as shown above.
Select four, 2 x 2 x 4' and cut them to 19" so you have
four equal pieces 19" long used as Corner Bracing. Cut a
45 degree angle on each end and secure two in place as shown
above (pre-drill the holes with a 1/16" drill bit).
Flip your Trellis over and repeat Step Five for the other
side.
Step Six, Layout & Fasten Top Crossbars
Set Trellis upright and select one of the nine Crossbars
used for the top of the Trellis; center it across the Top
Rails; make a pencil mark on the Crossbar where it makes
contact with the two Top Rails (should start at 9 1/2" from
the edge). Using a speed square, transfer these marks to
the other eight Crossbars on both ends as shown above. This
will insure that all crossbars are evenly centered.
Using a 1/16" drill bit, pre-drill a hole in the center of
each of the marked areas.
Step Seven, Attach Top Crossbars
Using the markings on the top edge of the Top Rails and the
markings on the Crossbars, line up the markings and attach the
Crossbars.
Move your trellis to the desired area; ensure it is level
and plumb; using metal fence post supports, drive the supports
at least three feet into the ground and attach them to
the four posts so the trellis will not topple in high winds.
Remove the temporary Support Rails, plant some climbing vines,
and enjoy your new Trellis.
|