|
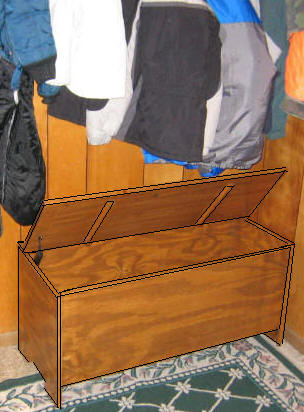
Building an Entryway Storage Bench that can
also be used
in an entry way, a mud room, or even as a Bedroom Storage
Bench can be fun and practical. This
simple, butt-jointed Blanket Chest can hold blankets or a good number of
gloves, hats, scarves, etc. You can build this
wood storage bench
from one, 3/4" x 4' x 8' plywood panel plus a few other
necessities.
Material List:
Note: For Outdoor use, use only
cedar or treated lumber.
One piece of 3/4" hardwood plywood,
4' x
8', plus
matching edging material.
One piece of 1/2" x 2' x 4' plywood
for the bottom panel.
One piece of 1 x 3 x 48" hardwood
for the top Cross piece.
1 5/8" Woodscrews.
A set of Hinges, one, interior lid support, wood plugs and/or wood filler.
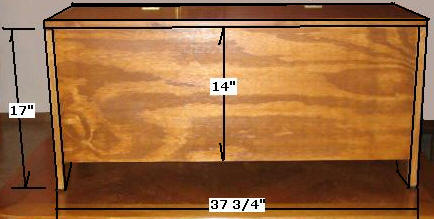
Step 1, Cut the Blanket Chest Pieces -
A. Select 3/4" x 48" x 96" plywood panel;
using your
Table Saw
with Extension Wings or using your
Circular Saw Cutting Guide, crosscut the
panel to 36 3/4". Using your table saw, rip it to two
pieces @ 14" for the Front and Back Base Panels.
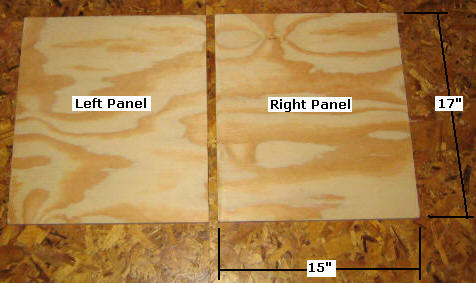
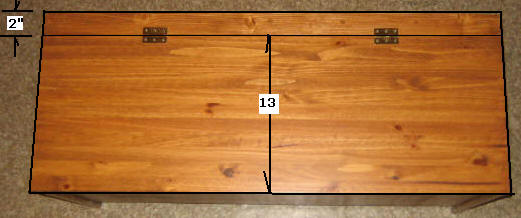
B. Select 3/4" plywood panel;
crosscut the panel to 15"; rip it to two pieces @ 17".
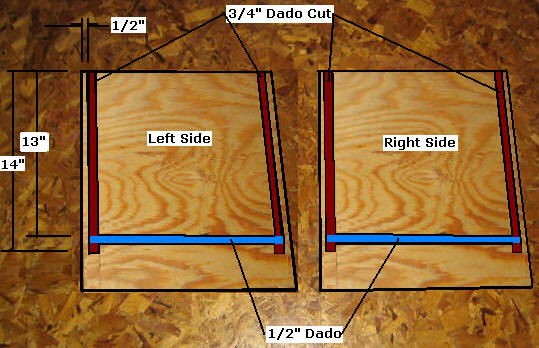
C. Select the Left/Right side
panels; Set the dado blades to 3/4" wide by 1/8" deep; set
the fence to 1/2"; at each of the four edges beginning at
the top edge, make the four passes 14" down as shown above
to receive the Front and Back Panels.
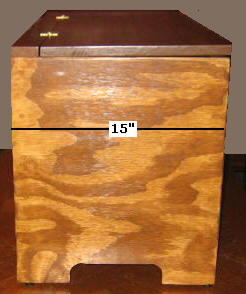
D. Select the two side panels; set
your router with a 1/2" straight gouge bit; set it for 1/4"
deep cut; set the guide so the top edge of the cut is 13"
down from the top edge; Make the router pass as indicated by
the blue lines above to receive the Bottom Panel.
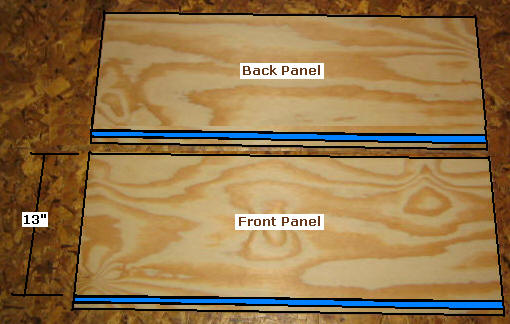
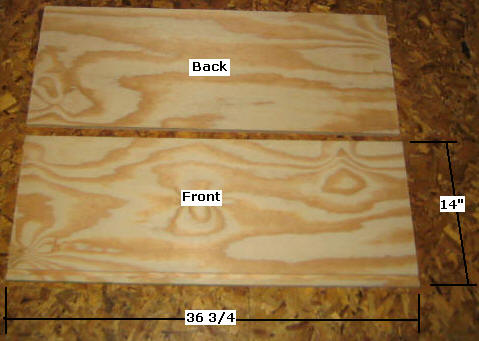
E. Select the Front and Back Panels
and your router already set with the 1/2" bit and 1/4"
depth, measure down the same 13" and router the bottom edge
as shown above.

F. Select the 1/2" x 24" x
48" plywood;
crosscut this bottom panel to 37 1/4"; rip this panel to 13
1/8".
G. Dry fit the base pieces.
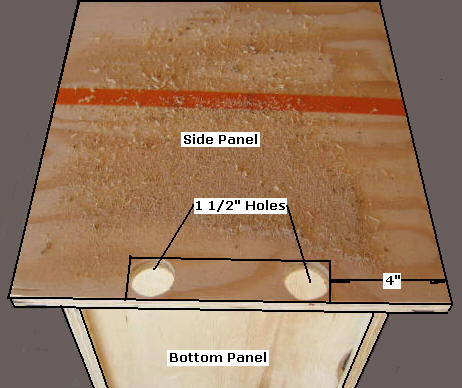
H. Select two Side
pieces to cut the bottom vents; on the bottom edge measure
in 4" from each side; measure up 1 1/2" to make a rectangle;
use a 1 1/2" paddle bit and drill two holes as shown above;
with a saber saw, cut along the top line and the bottom side
lines. Perform this process to both side panels.
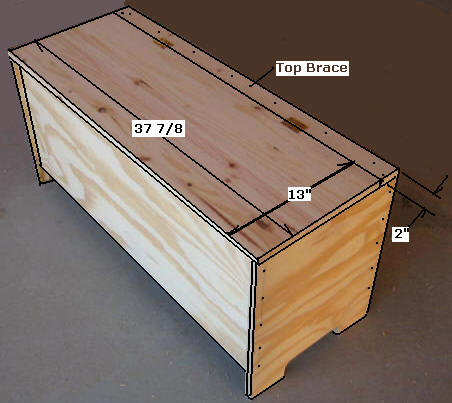
I. Select the 1 x 3 x 48" hardwood;
this will be used as the top brace; cross cut it to 37 78";
rip it to 2".
J. Select the 3/4" plywood, cut the
lid to: 13" x 37 7/8".
Step 2, Assemble the Blanket
Chest -
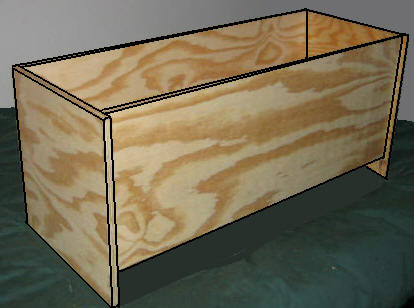
A. Select the Front, Back, Bottom, and two Side panels;
pre-drill/counter sink five holes along each edge, and
connect the side panels with 1 5/8" screws as shown above.
B. Select the Top Brace and attach
it as shown above.
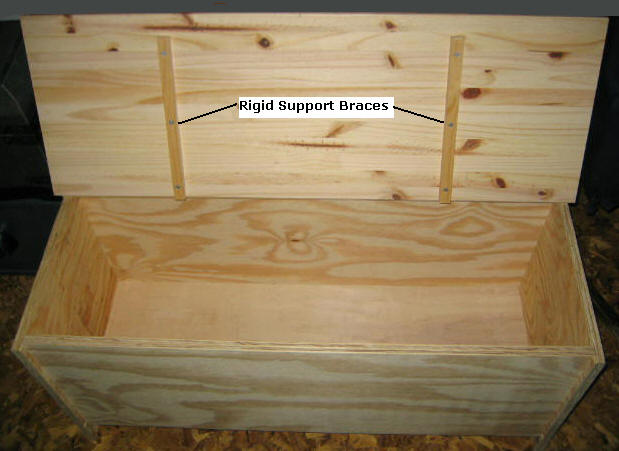
C. Select a piece of 1 x 1 square
hardwood; cut two pieces @ 11 1/2" for Rigid Support Braces
and connect them as shown above.
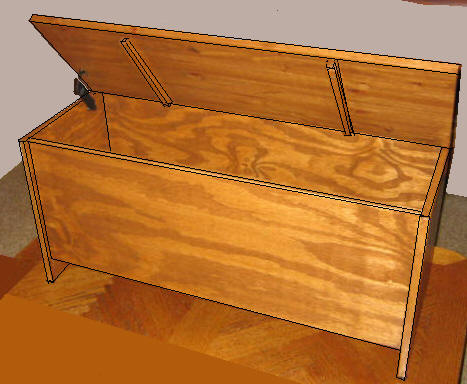
D. Select and attach the hinges. Select the interior lid support
bracket and attach it per the given instructions.
Step 3, Complete Chest- Apply
edging material, fill all holes with wood plugs and/or filler, sand, and apply
stain and poly. Once the poly has cured, apply foot pads.
If you would
be interested in other
FREE chest plans, click
here!
|