|
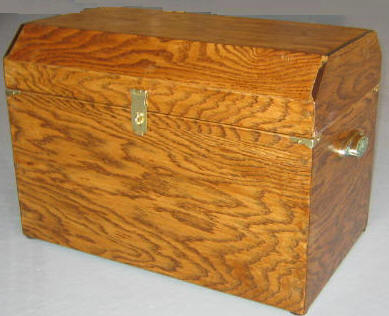
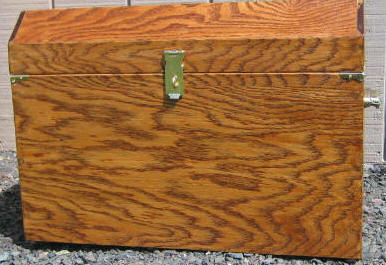
Introduction: The measurements for the Treasure
Chest in this plan are:
18" Wide x 13 1/2" High x 11 1/2 " Deep
Of course, you can adjust these measurements to suit your
requirements.
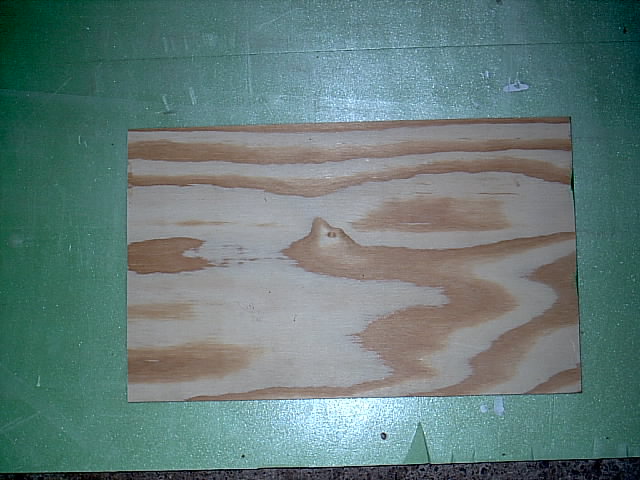
Select desired species/type of finished, hardwood
plywood; to replicate this treasure chest, select a piece of
3/4 Inch, hardwood plywood: 14 Inches Wide x 6 Feet
Long.
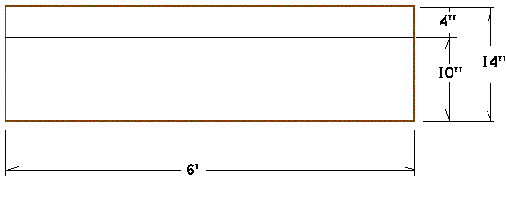
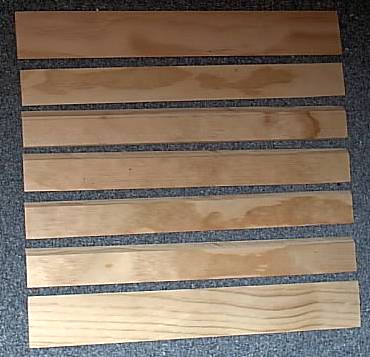
Step One, Rip the Base
Rip the 14" x 6' plywood to 10" for the base of the
chest; front/back and sides (be aware that the remaining four
inches will be used for the lid; the grain of the base
and lid will be matched).

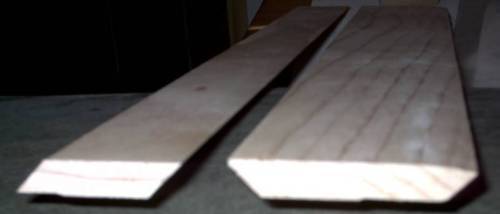
Step Two, Rip the Lid
Rip the remaining 4" x 6' plywood to 3 1/2 " for the lid
front rail /back rail and sides (cut the outside edge so the
grain matches where the lid and base meet).
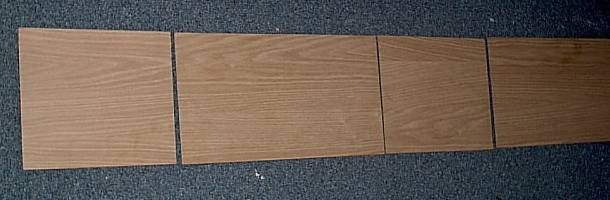
Step Three, Cross Cut Base
Using the 10" x 6' plywood, cross cut the base
pieces in the following order so the grain is continuous and
flows around your chest (mark each piece, #1 to #4, with a
pencil on the top edge):
1. 18" Front
2. 11 1/2" Right Side
3. 18" Back
4. 11 1/2" Left Side
Step Four, Cross Cut Lid Frame Pieces
Using the 3 1/2" x 6' plywood, cross cut the lid
frame pieces in the following order so the grain is continuous
(mark each piece, #1 to #4, with a pencil on the top edge to
match with the base markings/wood grain):
1. 18" Front
2. 11 1/2" Right Side
3. 18" Back
4. 11 1/2" Left Side
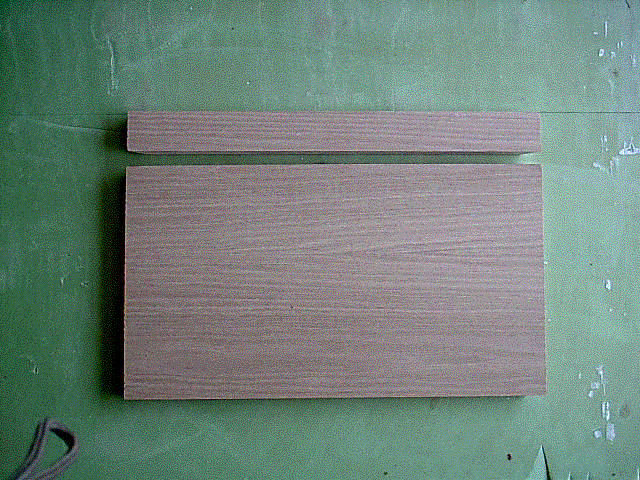
Step Five, Rip Front Lid Rail and Back Lid Rail
Take the two, 3 1/2" x 18" lid rail pieces (#1, Front rail
and #3, Back rail) and measure up 1 3/4" from where the lid
rail will meet the base and rip each piece to the 1 3/4" x
18":
#1 Front rail is now 1 3/4" x 18"
#3 Back rail is now 1 3/4" x 18"
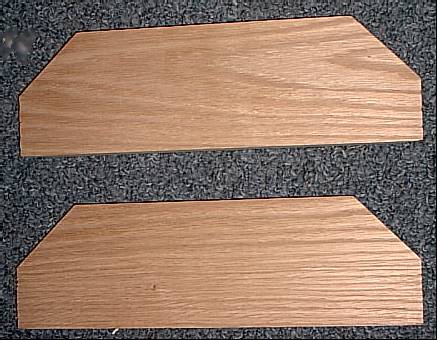
Step Six, Cut the Two Side Lid Pieces To 45 degrees
Take the two 3 1/2" x 11 1/2" lid side pieces (#2, Right
Side and #4, Left Side) and measure up and mark with a pencil,
1 3/4" on each side of each piece, from where the lid will
meet the base, and cut mirrored 45 degree angles.
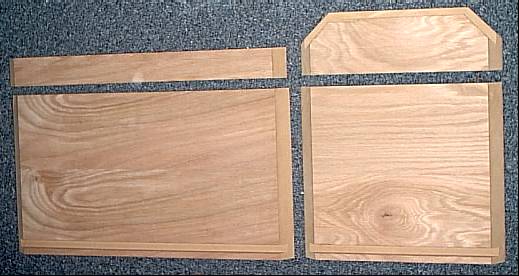
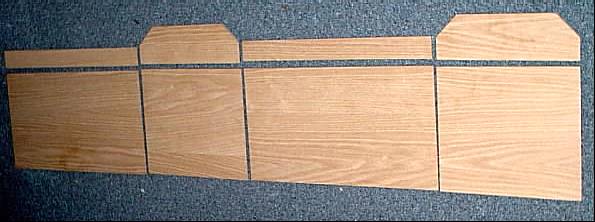
Step Seven, Cut Angles At the Corners
With the exterior side facing up, lay out your Base
pieces in order, #1 - #4. At this time, mark the edges
of the base as top and bottom.
With the exterior side facing up, lay out your matching
Lid pieces in order, #1 - #4. All the wood grain
should match; side-to-side; bottom-to-top.
Set your table saw blade at a 45-degree angle.
Using your panel cutter and a 1" piece of spacer wood
clamped to your rip fence, set your table saw to make all cuts
at 45-degrees precisely to the pre-cut pieces where the
corners will meet. All exterior dimensions for the Base
and Lid should remain the same: 18" Wide x 11 1/2" Deep
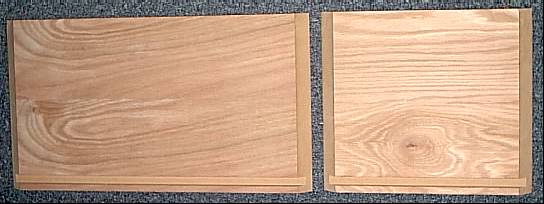
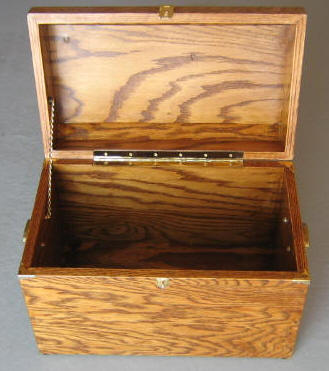
Step Eight, Make BASE Dado Cuts
Select a piece of plywood for the bottom panel of your
treasure chest; for this size of chest, 7/16" stock was used.
Set your table saw with a dado blade to receive this
dimension, 7/16", and cut to a depth of 3/8" (half the
thickness of the base material which is 3/4").
Set your saw's rip fence at 3/8" from the dado blade; this
will allow the dado cut to begin 3/8" from the bottom of all
base pieces to receive the bottom floating panel..
Proceed to make your dado cuts to the base pieces #1
to #4 at the bottom on the interior side of the
four pieces to receive the bottom panel.
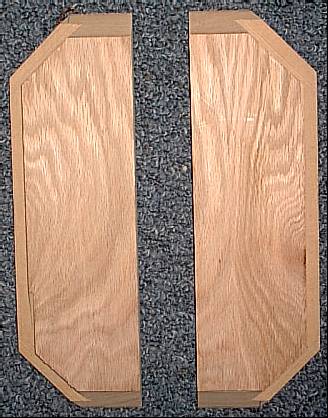
Step Nine, Make LID Dado Cuts
For the top of the Lid, determine the thickness of the
material to be used; in this case, old wood flooring strips
3/8".
Using a depth gauge or a sample of the wood, set the height
of the dado blade to 3/8".
Using a piece of 3/8" stock as a guide, set the rip fence
on your table saw to 3/8".
Proceed to make your three dado cuts to each of the two
side pieces of the Lid (#2 and #4) along the top edge
on the interior side of the two side pieces to receive
the wood strips for the top of the chest.
Step ten, Cut Bottom Panel
Cut the 7/16" bottom panel material to size: 17 1/8" long
x 10 5/8" High (the slight undersize will allow the panel to
float in the slotted base.
Dry fit the base pieces to include the bottom to ensure
proper fit.
Step Eleven, Cut Materials for the Top Lid Frame
Dry fit the four lid frame pieces; determine the distance
of the top pieces/slats from side to side; in this example: 17
1/4". Determine how wide you would like to rip your top
slats; for this chest, there are five @ 2" Wide x 17 1/4"
Long; determine how many you will need for your chest, and rip
them and cross cut them to size. The two edges of each
slat should be cut at a 45 degree angle (one edge to fit over
the adjoining rail/slat; the other edge to fit under the
adjoining slat). The last slat will require trimming for the
exact fit. Dry fit the slats in place.
Determine the width of the two starter slats that rest on
the 45 degree angles of the Lid framework (front and rear of
the Lid); for this chest, 3 1/2".
Cut the two starter slats with a 45 degree bevel and dry
fit them in place.

Step Twelve, Assemble Base and Lid of the Chest
After the slats have been dry fitted, sand all the interior
services with 220 grit sandpaper. Glue the base and lid
pieces together with a good quality glue and nail the pieces
in place with 1 1/4" brads.
After the glue has set overnight, apply plywood edging
veneer (nail on or iron on veneer) to all exposed plywood
edges of the Lid and Base of the chest.
Trim the veneer to size and sand all exterior services with
220 grit sandpaper.
Stain to desired color and apply two to four coats of
polyurethane.
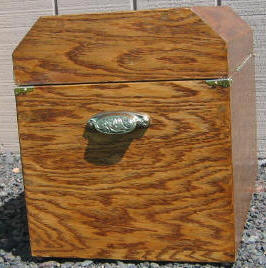
Apply the handles, hinges, lid support chain, and hasp; add
corner brass covers, if desired; also add felt pads to the
bottom of the chest.
If you would
be interested in other
FREE chest plans, click
here!
|